Dock Construction
Dock Building

Materials Used in Dock Construction

A dock is where boaters can safely dock and moor their vessels. It can also serve as a recreation space for swimming, fishing, and other activities.Dock Construction

Piling a dock is complex, and mistakes can be costly. It is essential to follow best practices when planning your pilings. Click Learn More for more information.

The decking material is another crucial choice for a dock. Southern yellow pine is a good option because it is affordable and pressure-treated to prevent rot.

Dock builders rely heavily on wood, whether it’s for pilings or decking. Using a natural material like wood also allows a dock to blend in with the surrounding environment. It’s important to choose the right wood, though. For example, cedar is a great choice for piers because it resists rot and mold very well. In addition, cedar is a more attractive choice than Southern yellow pine. The latter can splinter and isn’t as strong. Another option for decking is composite materials, which are a mix of wood fibers and plastic. These are also resistant to rot and mold, but they don’t have the same visual appeal as wood.

In general, the best choice for decking is pressure treated wood. Depending on the type of water, it may be necessary to use different levels of treatment for freshwater and saltwater. It’s a good idea to check the maximum height of the lake or other body of water. Once you know what that is, the deck should be built a few inches above that level.

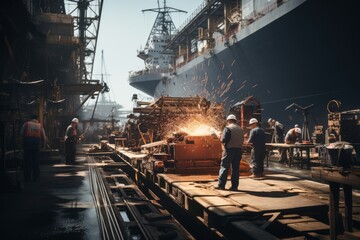
As with other types of construction, dock builders should follow blueprint specifications and safety regulations. They should be familiar with a variety of tools, including hand and power tools, chain saws, bobcats, trucks and drills. They must also be able to read and interpret blueprints.

Most dock builders go through a three- or four-year apprenticeship program, which includes significant on-the-job training. In addition to learning basic skills, apprentices typically attend specialized training with industry experts and manufacturer representatives. They must also take Occupational Safety and Health Administration safety courses, standard first aid and CPR classes, and tool or skill-specific certifications. As demand for new and repaired docks grows, job prospects for carpenters will improve.

Concrete

Concrete is an excellent choice for dock construction because it is durable, affordable, and resistant to damage. It also doesn’t contaminate the water, making it an environmentally friendly option. However, it may be more costly than other materials such as wood, but the initial cost is offset by the lower maintenance costs and long-term savings.

Floating concrete docks are built to be highly resilient, with a thick foam core that provides strength and buoyancy. This makes them a good choice for areas that are exposed to harsh weather conditions, such as tidal changes and storms. Additionally, a floating concrete dock allows for the installation of utilities and electrical lines, which are housed in the concrete.

The iDock is an example of a floating concrete dock that has been successfully tested against the effects of severe tropical weather, including hurricanes and high winds. The dock was originally constructed with an RC substructure consisting of piles and pile caps, as well as a wooden deck. However, following Hurricane Irma in 2017, the wood deck was destroyed and only the deteriorated concrete substructure remained. The iDock was reconstructed with a re-engineered RC deck using precast slabs carrying a GFRP grating, which increased the load-bearing capacity and durability of the structure.

The initial cost of a concrete dock can vary, depending on the size and complexity of the structure. A larger, more elaborate dock will generally have a higher cost than a smaller, simpler one. In addition, the type of concrete used can have a significant impact on price. Choosing a high-quality, specialized concrete mix may have a higher initial cost, but it can be more cost-effective in the long run by reducing maintenance expenses.

Steel

When building a dock, one of the biggest decisions you’ll make is what type of decking material to use. The most common is Southern Yellow Pine, which is a softwood that’s readily available and easy on tools. However, this wood does splinter and can rot with age. Our custom structures are made with “ground contact” pressure treated Southern Yellow Pine, which means the treatment penetrates the lumber to the utmost degree and will provide years of service.

Steel is a durable, cost-effective option for pilings and support beams. In addition, it can be driven deeper below layers of weaker soil and rock formations, which enhances the structural strength of a dock. Steel piles are also resistant to corrosion. Our docks are supported by galvanized steel. Unlike plain carbon steel, which can degrade in a marine environment, galvanized metal is coated with a layer of zinc to protect against rust and corrosion.

Another great choice for your dock structure is HDPE plastic lumber, which is very easy to work with and requires no special tools. This type of material is incredibly durable and can resist mold and mildew, unlike traditional wood materials. Our custom docks are constructed with either a modern through-flow or classic HDPE decking.

For safety reasons, you should install your dock to a certain height above the water level. This will help prevent the forming of ice that can break and damage docks. Generally, we suggest installing the dock a few inches above the maximum water line. You can find this mark by looking at the highest point of the lake, river or pond. It’s also a good idea to check with local towns and areas for permitting requirements before beginning construction on your dock.

EcoPile

A dock isn’t complete without a foundation, and the pilings that hold it all up. Unfortunately, marine pilings can be very vulnerable to damage. Whether from sun’s UV rays, fungus, termites, or wood-boring marine organisms, they can be ruined quickly. To prevent this from happening, they must be protected by piling caps.

Piling caps can also add a nice aesthetic touch to your dock. They are available in a variety of shapes, sizes, and materials, so you can choose the ones that will suit your specific dock design and budget. Some are even designed to help with the sturdiness of your piling. They have internal hexagram truss systems that boost the piling’s strength and rigidity.

These are a great option if you have a sturdier type of piling in mind, like fiberglass. Fiberglass is incredibly strong and can withstand the elements, so it doesn’t require extensive piling protection. In fact, a piling cap may be all you need to ward off roosting birds and add a finishing touch to your project.

With growing restrictions on the use of treated lumber in water, wooden pilings are being replaced more often than ever before. In response to this, Shoreline Plastics developed EcoPile. This patent-pending piling was engineered to outlast all others and stand up to the harsh marine environment. The patented composite marine piling is 100% free from leaching pollutants, impervious to wood boring organisms, and meets sustainability standards for strict environmental regulations. It also comes with a 25-year warranty.

Aluminum

Aluminum is an excellent material to use in dock construction for a number of reasons. It’s durable and low maintenance, and it also resists corrosion, which is a big benefit because aluminum is more likely to be exposed to the elements than wood or steel. A quality aluminum dock will last far longer than a pine or concrete one, which is why many homeowners choose it. It does, however, have the disadvantage of being slightly more expensive than other materials.

A high-quality aluminum dock can increase the value of a lake home, and it’s also aesthetically pleasing. The material is lightweight, which means it can be installed easily. It also places less pressure on the foundation and shore, so it’s more stable than wood or steel docks. Aluminum is also available with a variety of decking options, from a modern through-flow look to classic HDPE plastic or wood-grained decking.

Another advantage of aluminum is that it’s sustainable, which earns it points in the environmental friendliness column. It takes around 95 percent less energy to recycle aluminum than it does to manufacture the primary metal, which makes it a smart choice for environmentally-conscious property owners.

As a property owner, you want to be sure that your dock is safe and secure for you and your guests. The best way to do that is by hiring a licensed professional for your dock construction project. A licensed professional has completed training courses and received certification from the state of Michigan to build and inspect docks, which ensures that the finished product meets all applicable building codes and safety standards. A licensed professional is also more likely to provide a warranty on the work they perform.

kitchen remodeling
Kitchen Remodeling

Types of Kitchen Remodeling

Kitchen Remodeling Lexington KY may be in order if your kitchen needs to be updated or updated. There are many different types of kitchen remodeling, from a simple cosmetic makeover to a complete gut and replacement.

Most major remodels will require permitting and inspections. These typically include plumbing, electrical, and building work. Kitchen appliances also need to be upgraded to newer, energy-efficient models.

kitchen remodeling

A kitchen remodel ranges from cosmetic changes to a full-scale transformation that brings everything down to the studs and starts over. Depending on the scope, it may require hiring a general contractor to manage the work and ensure the project is completed within the budget. This is particularly important, as a full remodel can cost $42,000 or more and includes replacing all major surfaces with new flooring, countertops, sinks and custom cabinets. Larger jobs also often include upgrading appliances to energy-efficient models.

The initial design phase is a chance to explore designs and put your stamp on one of the most used spaces in the home. A GC will be able to offer suggestions and plans to help you flesh out your ideas before the project gets underway.

Before the work starts, the contractor will need to remove any existing fixtures and materials. This is typically a noisy, messy job that can involve taking down (potentially load-bearing) walls. It is also a good opportunity to replace old light bulbs with LEDs that use about 70% less energy and install a tankless water heater for lower monthly utility bills.

Kitchen remodeling is also the best time to replace aging and unwieldy appliances with models that operate better and save you money in the long run. Adding a microwave, dishwasher, or oven that is more efficient will help you cut down on energy consumption and make tasks easier.

When homeowners are remodeling their kitchens, they often want more than a cosmetic facelift. They want to make the kitchen functional, comfortable and enjoyable to use. To do that, they must consider design and layout.

Designers help owners visualize their kitchen remodel project and determine the best layout for the new space. They also help with selection of materials, from cabinets to counter tops, and appliances to faucets, that align with the design vision and budget.

The first step in the design process is determining what Ariana Lovato, owner of calls “scope.” This is when a homeowner decides whether they need to do a complete gut job—which requires demolition and major structural changes—or something smaller, such as replacing cabinets, counters and flooring.

It’s important to weigh scope carefully, as knocking down walls is a costly undertaking that can add up to 15% to the cost of a renovation. And remember, if you want to add more square footage, you’ll likely need to alter your home’s framing, move gas or electrical piping and possibly re-route heating and air-conditioning ductwork.

Adding more storage space is another common request for a kitchen remodel, but it’s important to be strategic and consider how you plan to use the space. For example, it makes sense to group like items together, such as placing the sink near the dishwasher and refrigerator because they both need plumbing.

The design stage of a kitchen remodel involves envisioning and planning the ideal layout and aesthetic. At this point, homeowners and designers can also start selecting materials from suppliers to align with their overall kitchen remodel vision. Cabinets and countertops usually come next in the remodeling process, followed by flooring, backsplash tile and other finishing touches.

It’s also at this stage that a homeowner decides whether to keep existing cabinets, which would limit the scope of the project, or upgrade to new custom cabinets to enhance the overall livability and value of the home. The scope of a kitchen remodel can range from what owner Ariana Lovato calls a “cosmetic refresh” to a full-scale renovation that includes tearing down walls and reconfiguring the space.

Another consideration at this stage is how much countertop space is needed. If the goal of a remodel is to increase livability and functionality, adding an island can be a great option. These versatile spaces are multifunctional and work well with any open-concept kitchen layout. They can be used as extra food prep surfaces, a dining area for two people or more, or even a workspace or arts and crafts center for kids. Other counter options include a galley kitchen layout, where the sink, stove and refrigerator are located along one wall. A peninsula is another option that combines the advantages of both an island and a galley.

When you’re remodeling a kitchen, choosing the best materials is crucial. The materials you choose determine the look, function, and durability of your finished product. You’ll need to consider use, cost, and color when selecting materials.

Flooring and counter-top materials are key for a kitchen’s functionality and appearance. Laminates, wood, and vinyl are common choices for kitchen flooring. Laminates provide a cost-effective option with an authentic look and feel. However, it’s important to select high-pressure laminates to minimize damage from heat and moisture. Vinyl and glazed porcelain tile are the most durable options for kitchen floors and countertops, and they’re available in solid sheets and planks that minimize seams.

Hardwood flooring and natural stone are premium options that add to your home’s resale value. These materials are expensive, but they’re long-lasting and require low maintenance.

Windows are another important component to consider. Window frames can be made from a variety of materials, but wood is the most durable and stylish choice for traditional, transitional or modern homes. Wood is also energy efficient, helping to keep your home comfortable and warm.

Wall surfaces can be covered with many different materials, but paint is the most affordable and versatile. It’s possible to purchase a wide selection of colors, styles and sheen levels to suit any decor. It’s important to select a low luster eggshell finish for walls and trim, and higher gloss paint for accents like crown molding.

The appliances you select for your kitchen have a major impact on the overall design of the space. In addition to considering your personal aesthetic, you’ll also need to consider how they will fit within the layout of the room and how they will function in terms of size, energy usage, and more.

While stainless steel continues to dominate, homeowners are experimenting with unique finishes like matte black or white. They’re also choosing more modular designs that allow for customization of storage space to suit their needs. This trend is great for those who want to create a stylish and functional space while keeping their cabinets uncluttered.

Another popular kitchen remodeling trend is to open up the space and add in more natural light. This can be done in a variety of ways, including by adding in more windows, double doors, or even a pass-through window.

Before making any final decisions on the appliances you’ll be using in your kitchen, consult with a professional who can offer expert advice and a showroom full of working models to help you make the best decision for your home. Also, remember to check out the manufacturer’s warranty coverage and any additional warranties that may be included with your purchase. After all, the last thing you want is to end up with a refrigerator or cooktop that can’t be repaired in your area!

Once your new kitchen is complete and all of the big-ticket items have been installed, it’s time to add the finishing touches. This might include a backsplash, paint, or other finishing touches to make the kitchen look beautiful and cohesive. It’s also a good time to add some decor, rugs and other accessories.

During this process, you should also prepare your home for the remodel and seal off entrances to keep dust, dirt and other contaminants from seeping into other areas of the house. It’s also a good idea to set up a temporary kitchen in the basement or somewhere else in the house, especially if you plan on cooking while the project is going on.

This kitchen remodeling process involves a lot of noise, mess and strangers traipsing through your house, so it’s important to stay patient and keep a clear line of communication with your contractor. Otherwise, you might return to a kitchen with handles mounted in the wrong spots, outlets wired in the wrong places or tiles that aren’t quite right. A reputable general contractor will take the time to listen to you, explain their work, and answer any questions that you might have. That way, you can rest assured that the end result is exactly what you want.

Siding Contractor
Stucco Services

Stucco Repair – How to Repair Stucco Cracks

Stucco repair is the process of repairing stucco cracks. Moisture intrusion in your home’s exterior wall can lead to mildew, mold, and, eventually, wall rot. Stucco Repair Charleston SC involves thoroughly inspecting your stucco wall system to find any underlying issues. This process usually starts with examining areas around windows.

Siding ContractorA hairline crack is a small surface crack within a wall crafted from stucco. These cracks have the same thickness as a strand of hair and can appear for a number of reasons. One of the most common is that the plaster used to construct the wall wasn’t mixed correctly. Another reason is that the house is settling, and yet another cause is that the exterior surface was painted too soon after the stucco was installed.

When a homeowner notices these cracks, they should be repaired promptly. This is because these cracks allow moisture to penetrate the stucco. This can cause mold, mildew, ugly discoloration of the exterior, and even wall rot that can require costly remediation.

The first step in repairing these small cracks is to pressure wash the entire area. This will ensure a clean surface to which the caulking or spackling will adhere. Applying a layer of acrylic paint over the crack is also a good idea to disguise it.

Once the crack is cleaned, opening it up at least a quarter inch with a cold chisel and hammer is important. This will prevent the crack from becoming a water leak later on. It is also a good idea to gently chisel the edges of the crack so that they are beveled evenly.

Next, the crack should be filled with a caulking product designed for stucco. There are a variety of options on the market, including sanded caulk that’s easy to use and paintable. Quikrete makes a popular brand of this caulking for mortar that can be found at many hardware stores.

If the crack is very deep, a bit of concrete patching mix may be necessary before applying a coat of acrylic caulk. It is important to follow the manufacturer’s instructions when mixing this product. Once it is mixed, a caulking gun can be used to fill the crack. It is a good idea to start at the top of the crack and work your way down, smoothing the caulk with your finger.

Repairing Cracks Less Than a 1/4 Inch

Typically, cracks less than a 1/4 inch deep are easy to repair. You can use a stucco patch from a hardware store for these small holes or surface divots. For a stronger patch, mix a small batch of Portland cement plaster and add coloring pigment to match your existing stucco. Apply the pigmented plaster to a piece of cardboard and let it dry before using it on your exterior wall. Once the patch is dry, apply it to your hole or divot.

Before you begin, make sure that your stucco isn’t deteriorating due to some underlying problem. For example, if the plaster has started to crumble or the lath underneath is rusting, you might need a remediation job instead of a simple repair. A stucco expert can check the integrity of your plaster and help you decide how to proceed.

Moisture penetration is one of the biggest culprits in stucco deterioration. It can enter through cracks, around window and door openings, or behind building paper that is torn or poorly lapped at seams. It may then seep into the studs of your walls, causing mold and mildew, discoloration, and even wall rot. Left untreated, wall rot can cause serious structural damage to your home.

Repairing moisture problems before they get out of control can save you thousands in damages. To do this, you must understand the difference between remediation and repair.

Remediation is an extensive process that fixes the underlying issues that cause deterioration. Remediation includes a thorough inspection of your entire stucco wall system, including the area beneath the damaged areas and any structures attached to your home, such as chimneys or wood siding.

Stucco is a popular material for exterior walls because it provides a stylish appearance and can resist damage from wind, rain, and other elements. It’s important to note, though, that it’s a very porous material that does require proper moisture management to stay in good condition.

You can usually tell if your stucco is in need of a repair if it feels spongey to the touch, or if you tap on it gently with a wooden hammer and hear a hollow sound. You can also try poking a screwdriver into the surface, but it’s best to call in a masonry contractor to determine the extent of your plaster damage.

Repairing Cracks More Than a 1/4 Inch

If your stucco is crumbling or displaying large cracks that span the width of an index finger, it may be time to call in a professional. These larger cracks, as well as loose stucco flakes and sticking windows or doors, indicate that the problem is more severe than a superficial crack and requires remediation.

Unlike repairs, remediation addresses the underlying cause of the deterioration. It can be more expensive, but it is the only method that will prevent the damage from recurring and may save you money in the long run.

Stucco remediation involves replastering the entire exterior wall system and is more extensive than repair, but it solves the underlying issue that’s causing your stucco to deteriorate. A professional can inspect your stucco and determine if the problem is caused by moisture, foundation settlement or other factors. They can then recommend the appropriate solution:

When you’re ready to tackle this job yourself, get a few quotes from area professionals before choosing one. This will help ensure that you’re paying a fair rate and are working with a trustworthy contractor. In addition, it’s always a good idea to compare prices on the materials needed for this project as prices can vary significantly from one retailer to another.

Begin by identifying areas of loose or cracked stucco and removing any that are secure. Loose stucco often bulges and feels spongey to the touch. Tap gently with a wood or acrylic hammer. Weak stucco will sound hollow, while intact stucco will ring back solidly.

Once the loose or cracked stucco is removed, you can expose the metal lath and studs beneath. Check the condition of the studs and sheathing for any damage or rot. If any are rotting, damaged or missing, replace them with new metal lath and sheathing. Nail the new sheathing securely to the studs and joists with heavy-duty nails.

Apply a base coat to the repaired area. You can use a pre-mixed patch that is ready to trowel on or mix conventional stucco repair mix in a wheelbarrow or plastic tray according to the manufacturer’s instructions. Let it dry thoroughly before applying a second coat of base.

Remediation

Stucco is a type of cement-based plaster that is often used as a decorative and protective coating for the exterior of homes. Over time, it can develop damage from exposure to weather and age, but it is possible to fix this with stucco repair. This is typically done by using a combination of Portland cement and sand, although builders sometimes add acrylics or lime to the mix.

The first step of remediation is to perform a thorough inspection of the stucco wall system, looking for any signs of moisture intrusion. This typically includes checking around windows, as this is a common place for moisture to enter the home’s structure. If underlying issues are discovered, the stucco layers are stripped back to the base of the wall so that they can be repaired.

Remediation is a more expensive service than simple repairs, so homeowners will want to use it only when necessary. However, failing to address water intrusion will eventually lead to more serious problems in the future. For example, if water penetrates the stucco, it may also impact the wood framing of your home, causing mold and rot.

A professional masonry contractor or siding company should perform the stucco remediation work to ensure that it is done correctly. They will remove the damaged stucco, and clean the wall systems underneath it. Then, they will repair the underlying structures and apply new layers of stucco to prevent further damage.

If you are concerned about the condition of your stucco, watch out for red flags such as chipping or dark spots near doors or windows. These are typically a sign that the stucco is about to fail and should be repaired by a professional as soon as possible.

Alternatively, you can purchase a pre-mixed stucco patch at most hardware stores. This is a great option if your stucco is in good shape, but you have a small area that needs to be patched. Just be sure to follow the manufacturer’s instructions for proper application. Then, let the patch dry before painting it.

Flooring
Flooring

What Are Laminate Floors?

Laminate floors are a type of flooring that is made from a composite material. They are a great choice for homeowners who want a durable and affordable flooring option. Its popularity is largely due to the fact that laminate floors are extremely durable and resistant to damage. They’re also very easy to maintain.

Flooring
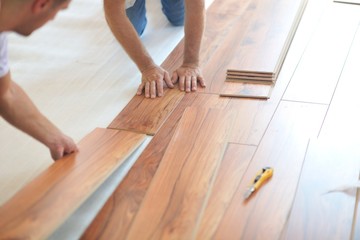
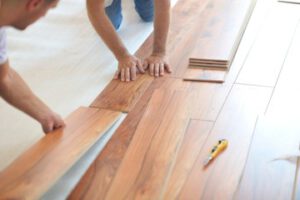
Laminate floors are popular for homeowners because they are durable and look great. They are also easy to install and come in various styles, so you can find one that suits your taste. The durability of laminate flooring can be determined by abrasion class ratings, ranging from AC1 to AC5. The higher the abrasion rating, the more durable your laminate floor will be.

Abrasion classes are measured using Tabar wear tests that simulate years of heavy use compressed into a short duration. Each turn results in a small amount of damage to the material. The higher the abrasion rating, laminate floors are usually more resistant to scratches and dents than hardwoods or EVP flooring. This makes them an ideal choice for homeowners with kids or pets who love to play on the floor.

Laminate floors are one of the easiest types of flooring to keep clean and look good. They don’t trap dirt and dust under their surface like wood or other floors, and fur doesn’t get stuck between the planks. They also resist scratches from furniture legs and pets’ nails because of their strong top layer. This makes them ideal for families with small children and dogs or cats.

You can clean laminate flooring easily with a dust mop and vacuum cleaner, or use a damp cloth mop to wipe up spills. Light cleaning with a manufacturer’s recommended product (such as water, vinegar, or mild detergent) will keep your laminate floors looking great.

You should also regularly sweep the floors in the same direction as the tiles were laid to pick up any debris between the interlocking pieces. Scratches in the laminate’s protective wear layer can form if excess dirt and debris is left to accumulate over time.

Laminate floors come in a wide variety of designs. They can mimic a variety of materials including wood, ceramic tiles, and stone.

They’re a great choice for spaces that experience high traffic and foot traffic, such as kitchens, living rooms, bathrooms and bedrooms. They’re durable and incredibly easy to maintain.

Choosing the right color and texture will help you achieve your desired design goals. A neutral white laminate can add an immediate warm feel to a room, while a cement gray finish looks sophisticated and modern.

The thickness and width of the planks will determine how the floor fits together and how it handles heavy foot traffic. Thin boards are ideal for traditional styles, while wide planks provide a contemporary vibe.

The core layer is made from a high-density fiberboard that resists damage due to heavy impact. It also protects against moisture. Backer layers provide a balancing effect to keep the planks straight and sturdy.

Laminate is a versatile flooring option that can be installed in almost any house room. It can mimic the look of hardwood, ceramic tile or stone floors.

It’s one of the most affordable flooring options, and a good choice for homeowners who want durable floors that are easy to clean. It’s also resistant to water and staining.

The cost of laminate flooring depends on the quality and design of the product, as well as the labor required to install it. Laminate that needs to be laid in a specific pattern or style can significantly increase labor costs.

The best-quality laminate floors are thicker, have a better wear layer and are designed to be used in high-traffic areas. They also have a warranty covering repairs and replacements for many years.

Laminate floors are a type of flooring made from several layers of materials that are fused together. The top layer is a photographic image of wood, tile, or stone, which is then sealed with a clear protective layer. The other layers consist of a core made of high-density fiberboard or particleboard, and a bottom layer that provides stability and moisture resistance.

Laminate floors are popular because they can closely resemble the look of hardwood, tile, or stone floors, but at a lower cost. They are also easy to install, durable, and require little maintenance. Additionally, they come in a wide variety of colors, patterns, and textures, making it easy to find a style that suits your home décor.


Roof Leak Repair
Roofing Services

Tips for Roof Leak Repair

Roof leaks are a major concern for homeowners, as they can cause rotting framing, mold growth, and water damage to your walls and ceilings.Roof Leak Repair

Often, roof leaks can be traced back to their source. However, finding the exact spot isn’t always easy.

If you’re a home owner, you should know that one of the most common causes of roof leaks is flashing damage. This is because faulty flashing can allow water to enter through tiny cracks in your shingles or even under them.

There are a number of things that you can do to check for this type of problem. The first thing that you should do is look at your flashing, particularly around valleys or where two roofing planes meet. If you notice any cracks in your flashing, or if they’re slightly bent or cracked, you should have this area looked at right away.

Another sign that your flashing needs repair is if it’s starting to rust or corrode. This is a sign that the flashing material no longer protects your roof from water, and it will need to be replaced or cleaned up.

You may also be able to see signs of this problem if your shingles are lifted around the flashing. This indicates that the flashing is no longer protecting the shingles and the shingle deck below it from rainwater and will need to be repaired.

The best way to repair this is by filling in the small holes with roofing cement and then patching them up. Start by roughing up the area around the hole with a little bit of sandpaper to make it easier for the cement to adhere to the damaged flashing.

Once you’ve cleaned up the area, you should cut a patch that is a little larger than the hole so that it overlaps on all sides. Then, apply a generous amount of roofing cement to the patch and the flashing itself.

Depending on the severity of the problem, this can be done by yourself, or it might be better to leave the work to the professionals. A professional can ensure that the flashing is correctly installed, which helps prevent a future roof leak from occurring.

A professional should also be able to spot other issues that might indicate damaged or faulty flashing. This could include a musty smell coming from your chimney or firebox. These are signs that the caulking has broken and that the flashing no longer provides a seal against water.

Whether you have a leaky roof or plumbing, it is important to get the repairs done quickly and properly. The longer the problem goes unaddressed, the worse the damage may become.

First, you must determine where the leak is coming from. Some leaks can be easy to spot, but others can be quite tricky to identify. For example, if it is raining and your water is dripping from your ceiling but you don’t have any obvious signs of roof leaks, such as mold or discoloration, you could have a plumbing pipe that is leaking in the ceiling.

It is also important to note that a plumbing leak that is dripping from the ceiling will usually happen at a steady rate and stop when you turn off your water supply. While it can be difficult to pinpoint a plumbing leak that is dripping at a constant rate from the ceiling, you should be able to tell if it is a leaking pipe or not by the color of the water.

Another way to check for a leak is to see if it appears in the same place every time you have a heavy downpour. This will help you find out where the leak is coming from and will prevent you from wasting money on costly roofing repairs that are not needed.

If you have a leak in the same area each time it rains, you can look for stains that are several feet above the leak or to the left and right of it. If the stains are near any roof penetrations, such as vents, pipes, dormers, or chimneys, these are the most common culprits.

Roofing Companies
Roofing Services

Services Offered by Roofing Companies

While there are many types of residential roofs, some are more suited for low-slope or steep-slope applications. Asphalt shingles are the most common type of steep-slope roofing material in the area. They are inexpensive, durable, easy to repair, and available in many styles and colors. Furthermore, many manufacturers have tested their products to meet the City Code’s requirements for reflectivity.Roofing Companies

Steep-slope roofing can be aesthetically pleasing and also has a lower risk of roof damage. However, it requires a skilled roofing contractor to install it properly. They have specialized knowledge that can install a steep-slope roof that meets your requirements and reduces your insurance premium.

Slope type is another important consideration for a roofing company. Depending on the design of the building, a low-slope roof can be either flat or steep. Flat roofs have a moderate slope, while steep-slope roofs have a steeper slope. Both types of roofs need different drainage systems.

Choosing the proper type of roofing material for a steep-slope roof is important for the durability of the final project. The type of material and its thickness must be suitable for the slope of the roof. It should also be waterproof, and the underlayment must be adequate for the slope.

A low-slope roof is more affordable to install than a steep-slope roof. They also offer several advantages to commercial buildings. A low-slope roof can be installed in a shorter period of time and require fewer materials. Furthermore, the process of installation is less dangerous for the laborers. However, it is important to ensure perfect waterproofing and keep the roof clear of debris.

A steep-slope roof is more expensive and requires greater maintenance than a flat roof. Generally, low-slope roofs have a minimum slope of 1/4 inch per foot, which promotes drainage and minimizes ponding. A steep-slope roof is more durable, but it also increases the amount of unusable space in commercial buildings.

In addition to repairing roofs after a storm, roofing companies offer other services, including disaster repair contracts with insurance companies. These contracts give roofing companies a guarantee of work and payment for replacement costs. They also give roofing companies access to insurance adjusters and an opportunity to establish professional relationships. To qualify for these insurance contracts, a roofing company must have a strong reputation and prove it is the best choice for storm damage restoration.

Storm damage restoration companies have a reputation for storm-chasing. Many storm-chasing companies are known to focus on selling their services rather than doing a good job. In fact, many of these companies have changed their names several times. Unfortunately, most of them will go out of business within seven years.

It is also essential to hire a licensed roofing company. You want a company that is licensed and insured to protect your home. Remember, storm damage is always a risk, and there are scammers out there. Always work with a legitimate roofing company and file a storm damage insurance claim. These companies will help you mitigate storm damage while an insurance adjustor comes out to assess the damage. Some roofing contractors will help with cleanup and mitigation while the storm assessor arrives, which can help you avoid scammers.

Lifetime warranties can be an excellent way to protect your investment and peace of mind. Whether you need a new roof for your home or need to repair an old one, it is essential to know your rights and what you can expect from your contractor. While most warranties are for a limited time, you should make sure that the warranty will cover any faulty work and materials.

A lifetime warranty is a guarantee given by the roofing company or the manufacturer. Some companies offer a lifetime warranty on their materials and labor, while others offer a prorated lifetime guarantee. The best way to know if you’re getting a lifetime warranty is to ask your roofing company. Some companies have affiliations with certain manufacturers and can offer a better warranty package than others.